02 Jul

Posted By
0 Comment(s)
150 View(s)
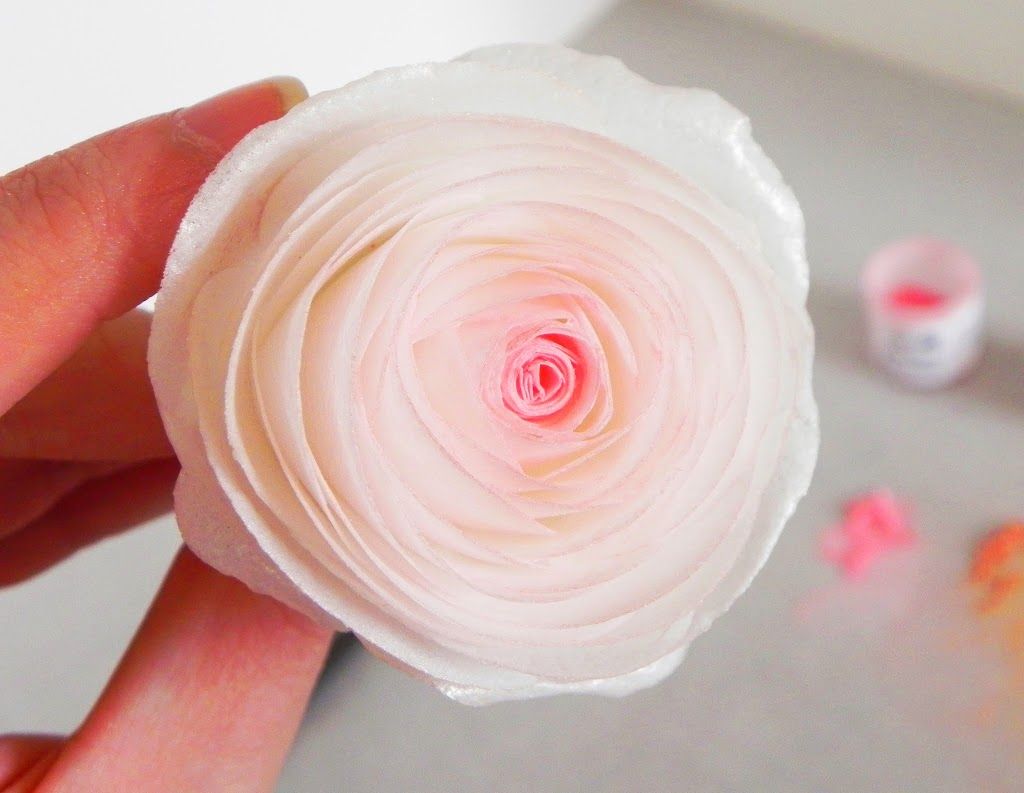
Wafer floristry is rapidly winning positions from sugar floristry. Of course, it is unlikely to completely replace sugar paste flowers with wafer ones. After all, products made from sugar paste have no equal in realism - they exactly repeat the appearance of living plants. But making a wafer flower is much easier and faster. And most importantly, you can do without special tools, using only available materials. This cake decoration option is ideal for beginners and under conditions of limited time.
A few facts about wafer paper
Composition: rice or potato starch, drinking water, vegetable oil. Simple and natural ingredients that are safe for health.
Taste qualities: rice paper has no taste or smell whatsoever. It can be characterized as neutral or tasteless.
Thickness. Sheets of edible paper are produced in different thicknesses. For making flowers, thin paper is best suited. It is more flexible than thick paper and has a texture similar to a real flower.
How to make a wafer flower
So we got to the most interesting part - a master class on wafer flowers. There are several options for assembling flowers of varying degrees of complexity. Let's look at a simple wafer rose, which even a beginner can assemble.
You will need:
wafer paper (approximately 3 sheets);
pastry brush or a new stationery brush (preferably 2);
scissors (manicure ones are perfect, because we will be cutting out circles);
edible marker (or a regular pencil)
circle templates (small, medium, large);
dry food coloring (petal dust);
a little vodka;
a piece of fondant.
 What is all this for:
Paper - actually for the flower.
Pencil - to draw the outline of the petals.
Templates - we will trace the petals along them. You can cut out circles of the required size from cardboard in advance. Or use stencils, cookie cutters, jars, and any other suitable objects;
Scissors - to cut out the petals.
Brushes - one for vodka, the other for coloring.
Dry coloring - we will tint the finished flower. Petal dust is ideal, but any powdered food coloring can be used.
Vodka - needed for gluing parts.
Fondant - we will form the base for the flower.
What is all this for:
Paper - actually for the flower.
Pencil - to draw the outline of the petals.
Templates - we will trace the petals along them. You can cut out circles of the required size from cardboard in advance. Or use stencils, cookie cutters, jars, and any other suitable objects;
Scissors - to cut out the petals.
Brushes - one for vodka, the other for coloring.
Dry coloring - we will tint the finished flower. Petal dust is ideal, but any powdered food coloring can be used.
Vodka - needed for gluing parts.
Fondant - we will form the base for the flower.
Making a rose from wafer paper
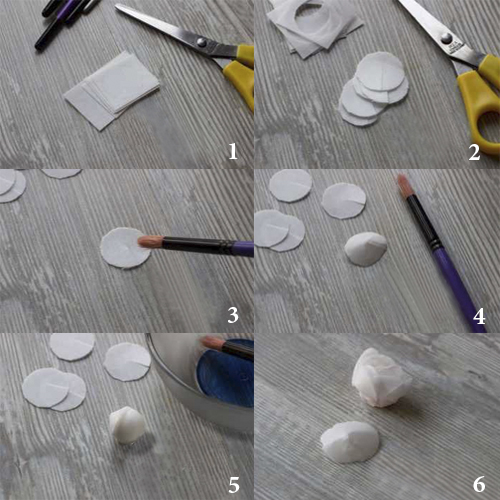
Step 1. Roll a fondant ball. The larger your flower will be, the larger the base should be.
Step 2. Take a sheet of paper, a pencil, and a small template. Its diameter should be slightly smaller than the base ball. Trace the template on the paper. You should get about 10 small petals.
Step 3. Now the circle petals need to be cut out. Cut them out so that the outline remains on the paper, and it is not visible on the petal at all. If it turned out not entirely even - do not be upset, this way the flower will look more natural. Now make a small cut on each circle - like drawing the radius of a circle in school.
Step 4. Take a brush, carefully moisten it with vodka. (There should be very little of it, otherwise the paper will get soaked and begin to melt. A small amount of vodka will make the paper elastic, and you will be able to give the petals the necessary shape. Plain water will also work, but the petals will take much longer to dry). Run a damp brush along the cuts-radii, fold the petals in the shape of small cones.
 It should be said that wafer paper is rough on one side and smooth on the other. It is the smooth side that is the "face", so it should be on top.
Step 5. Take a wafer cone and attach it to the fondant ball. Cover the entire ball in this way, placing the petals slightly overlapping. The fondant should not be visible at all.
Step 6. Now choose the side that will become the core of the flower. Glue the remaining small cones on top, forming a bud. Lubricate only the bases of the petals, otherwise they will stick together. If you want to give it a more natural and relaxed look, lightly moisten the edges with a brush as well.
Step 7. Now use a medium-sized template to make larger petals. Choose the quantity yourself, depending on the desired fluffiness and size of the flower. Cut the edges unevenly, so the flower will look more like a real one. Cut the petals from the bottom in the same way to form a small rounding inherent in the calyx of a rose. Glue them with vodka, lubricating only the base.
Step 8. We act similarly with large petals. The more of them, the fluffier the flower will be. When the rose is ready, run a damp brush along the edges of the petals, give them the necessary shape with your hands.
Step 9. It's time to tint our rose. Take some dry food color with a brush, paint the middle. You can also shade some petal dust on other petals. Do not try to paint them completely, make a color shading on several petals. If you want to color the rose in brighter colors, you can dilute the coloring with vodka. Very carefully paint the petals with a brush with a small amount of paint. Excess moisture will ruin your creation. After such coloring, your flower will look a little disheveled. Like a real rose that has long delighted others with its beauty. This stage can also be performed using an airbrush. We wish you pleasant creativity!
It should be said that wafer paper is rough on one side and smooth on the other. It is the smooth side that is the "face", so it should be on top.
Step 5. Take a wafer cone and attach it to the fondant ball. Cover the entire ball in this way, placing the petals slightly overlapping. The fondant should not be visible at all.
Step 6. Now choose the side that will become the core of the flower. Glue the remaining small cones on top, forming a bud. Lubricate only the bases of the petals, otherwise they will stick together. If you want to give it a more natural and relaxed look, lightly moisten the edges with a brush as well.
Step 7. Now use a medium-sized template to make larger petals. Choose the quantity yourself, depending on the desired fluffiness and size of the flower. Cut the edges unevenly, so the flower will look more like a real one. Cut the petals from the bottom in the same way to form a small rounding inherent in the calyx of a rose. Glue them with vodka, lubricating only the base.
Step 8. We act similarly with large petals. The more of them, the fluffier the flower will be. When the rose is ready, run a damp brush along the edges of the petals, give them the necessary shape with your hands.
Step 9. It's time to tint our rose. Take some dry food color with a brush, paint the middle. You can also shade some petal dust on other petals. Do not try to paint them completely, make a color shading on several petals. If you want to color the rose in brighter colors, you can dilute the coloring with vodka. Very carefully paint the petals with a brush with a small amount of paint. Excess moisture will ruin your creation. After such coloring, your flower will look a little disheveled. Like a real rose that has long delighted others with its beauty. This stage can also be performed using an airbrush. We wish you pleasant creativity!
Did you like the article? Click the "share via social networks" button to easily find it when needed.